Sept 2009
36
someone else created and sent to you). Use the processes in this section to attach a
document to an RPA once you have opened it. To view an attachment to an RPA
that you have received, see Viewing and Printing an Attachment.
Step for Attaching a Document or Comment
Follow these steps to get started with the attachment process:
Step
Action
1
While the RPA to which you want to attach a document is open on your screen,
click the Attachments icon (the paperclip) on your toolbar.
2
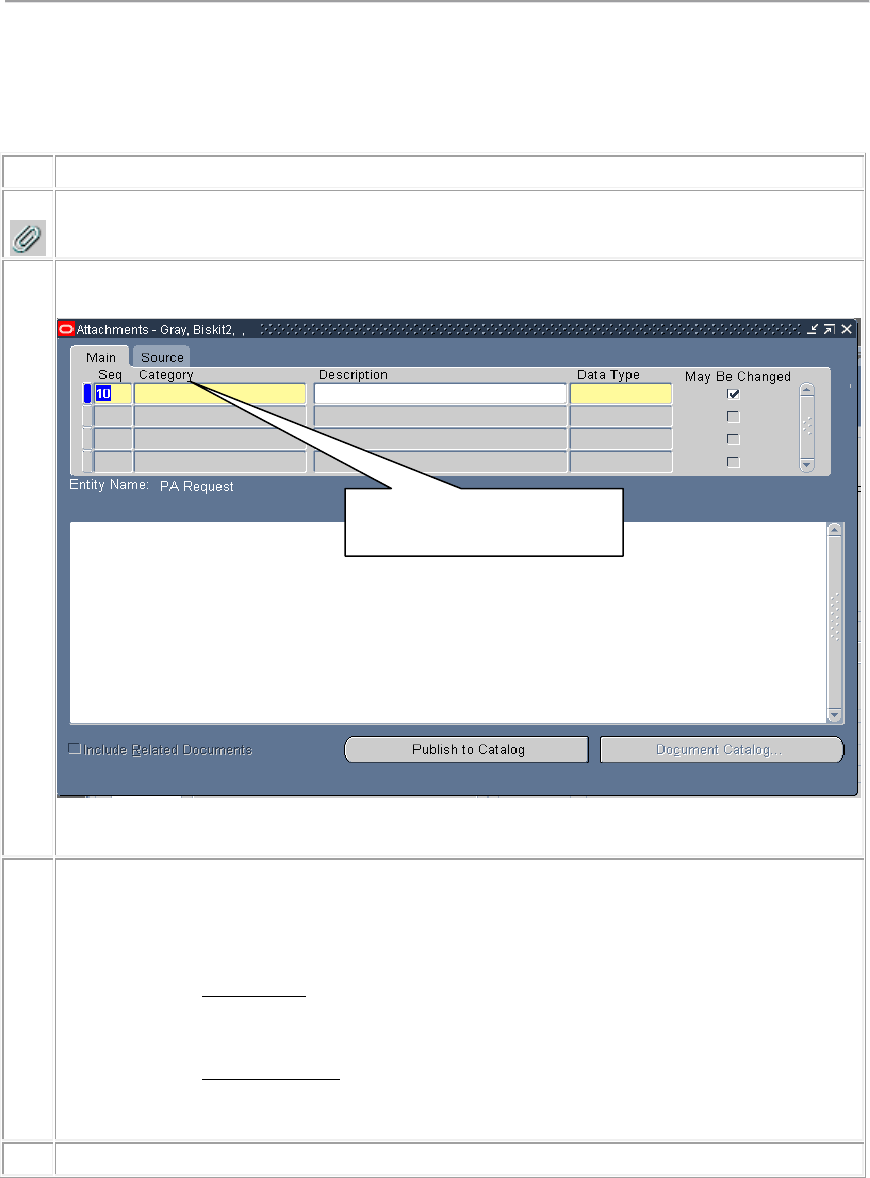
The Attachment Window is displayed:
3
Click the Category data field. Type in the letter "C" or "M" depending on whether
you are going to type in some comments ("C"), or attach a file ("M" --
Miscellaneous). You can also select one of these using the LOV button.
o Comments allows you to enter text and save it with the RPA. This
is similar to using the notepad, but using Comments does not have the
2000-character size limitation of the notepad.
o Miscellaneous is used to attach an existing document from another
application such as Microsoft Word, Excel, etc.
4
Type a description of the information to be attached in the Description data field
Category is Comments or
Miscellaneous

Sept 2009
37
by typing something descriptive, short, specific, and understandable to users, e.g.,
"Job description PD0314," "Org Chart Trng Div," etc.
5
Click the Data Type data field. Then click the LOV button for a listing of data
types that can be attached. Click the data type you want and click <OK>. The most
commonly used data types are:
o File – allows you to attach a Word document, spreadsheet, etc., to
the RPA. When you select this, an Upload File window will open.
Continue at Attaching a File, below.
o Long Text – allows you to type free-form comments similar to
using the notepad, but without the 2000-character limitation of the
notepad. Continue at Adding a Comment, below.
o Short Text – allows you to type free-form comments similar to the
notepad.
Also like the notepad, Short Text has a 2000-character limitation. Continue
at Adding a Comment, below.
Adding a Comment (Long or Short Text)
Click in the large white area and type your comments:

Sept 2009
38
When you are done typing the comments, click the Save button on the toolbar to save the
attachment information. You can then close the attachment window to return to the RPA, or add
another attachment if desired.
Attaching a File
Follow these instructions to attach a file (Word document, Excel spreadsheet, or other computer
file):
Step
Action
1
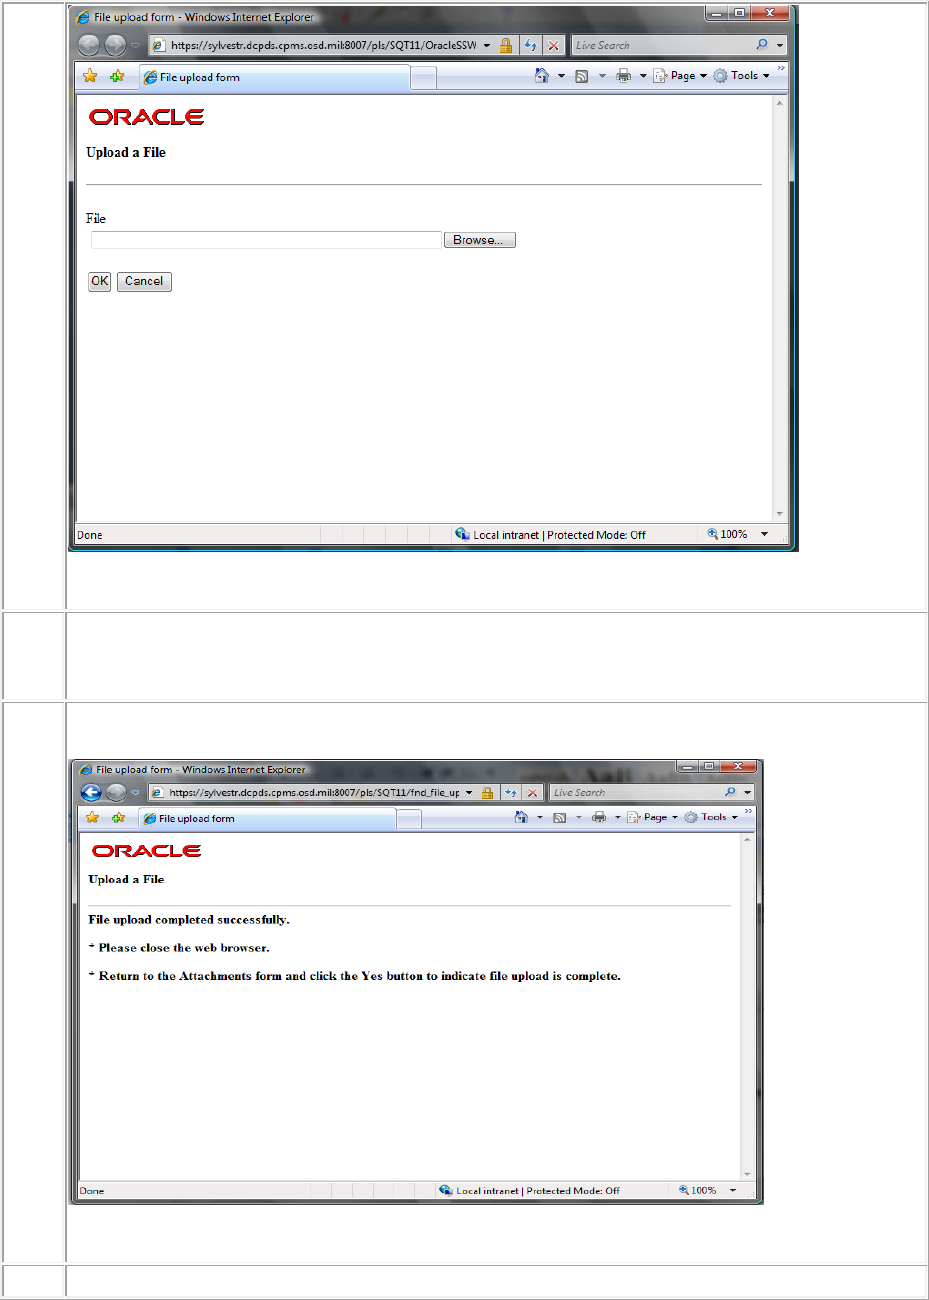
When you select "File" as the "Data Type" in step 5 above, a File Upload window
displays:
Sept 2009
39
2
Click the <Browse> button and find the file that you want to attach. You will have
access to the same drives and folders that you normally access from your workstation.
After you have selected the file, click the <OK> button on the File Upload window.
3
Once the file has been uploaded, the following message displays:
4
Close the window to return to the Attachment window, and click the <Yes> button on
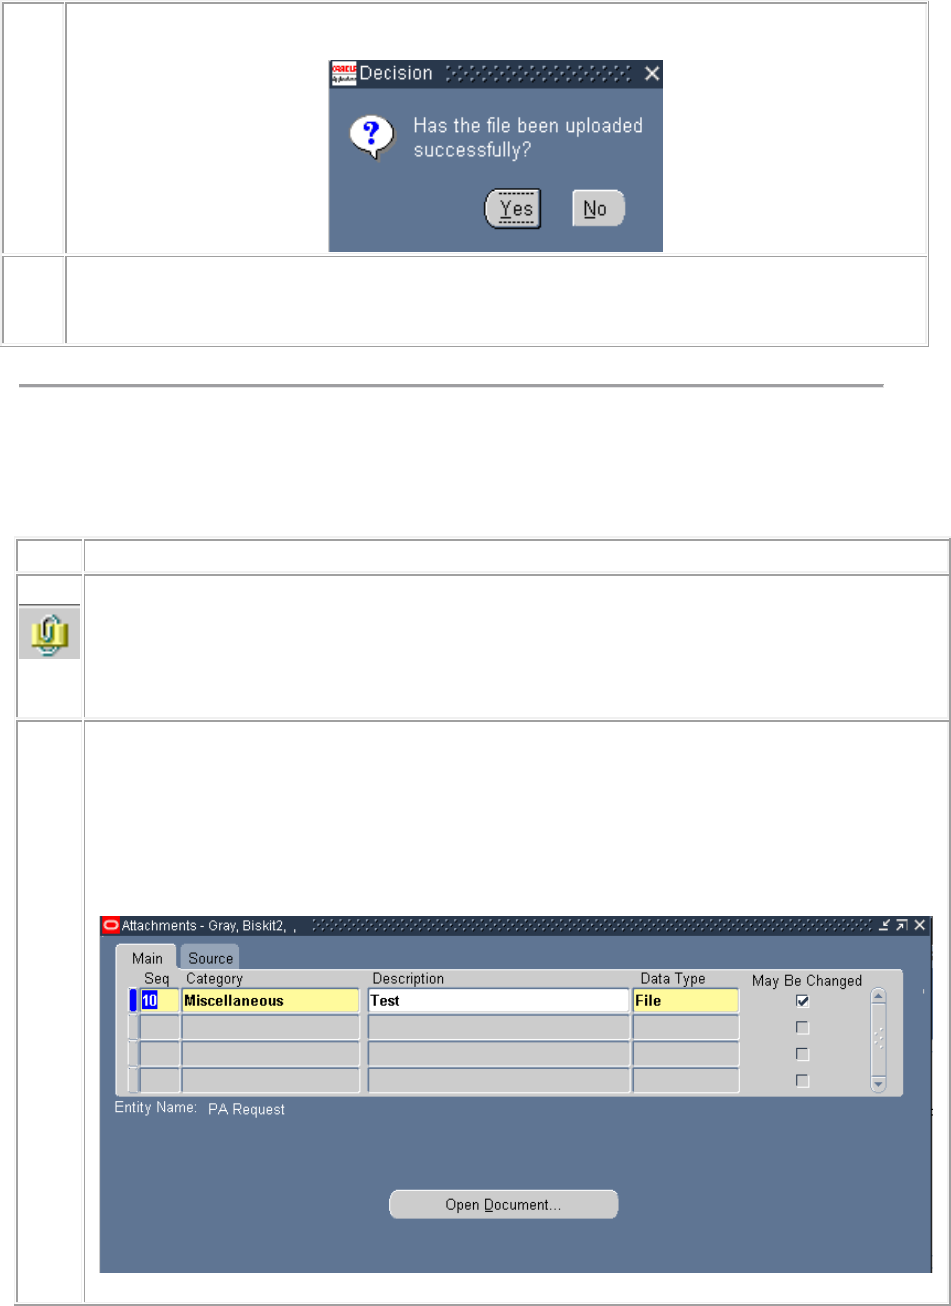
Sept 2009
40
the decision window:
5
Click the Save button on the toolbar to save the attachment information. You can then
close the Attachment window to return to the RPA, or add another attachment if
desired.
Viewing and Printing an Attachment
Follow the steps below to view or print an attachment to an RPA.
Step
Action
1
To view the attachment(s) to an RPA, click the Attachment icon on the Toolbar (the
RPA must be open on your screen).
Note: You can tell if there is an attachment to an RPA or any other personnel document
by the "paper" in the paper clip Attachment button on the Toolbar.
2
The Attachments Window is displayed. Click on the line containing the attachment you
want to view or print (if there is more than one item).
o For a file, click the <Open Document> button. The file will open in a
separate browser window where you can view or print it.
o Comments will display automatically when you select a "Comment" item.
Sept 2009
41
3
When you are done, close the Attachment window to return to the RPA.
Deleting an Attachment
To delete an attachment to an RPA, follow these steps:
Step
Action
1
Click the Attachment button on the Toolbar (the RPA must be open on your screen).
Note: You can tell if there is an attachment to an RPA or any other personnel document
by the "paper" in the paper clip Attachment button on the Toolbar.
2
The Attachments Window is displayed. Use your scroll bar to locate and click on the
item you want to delete (if there is more than one item).
3
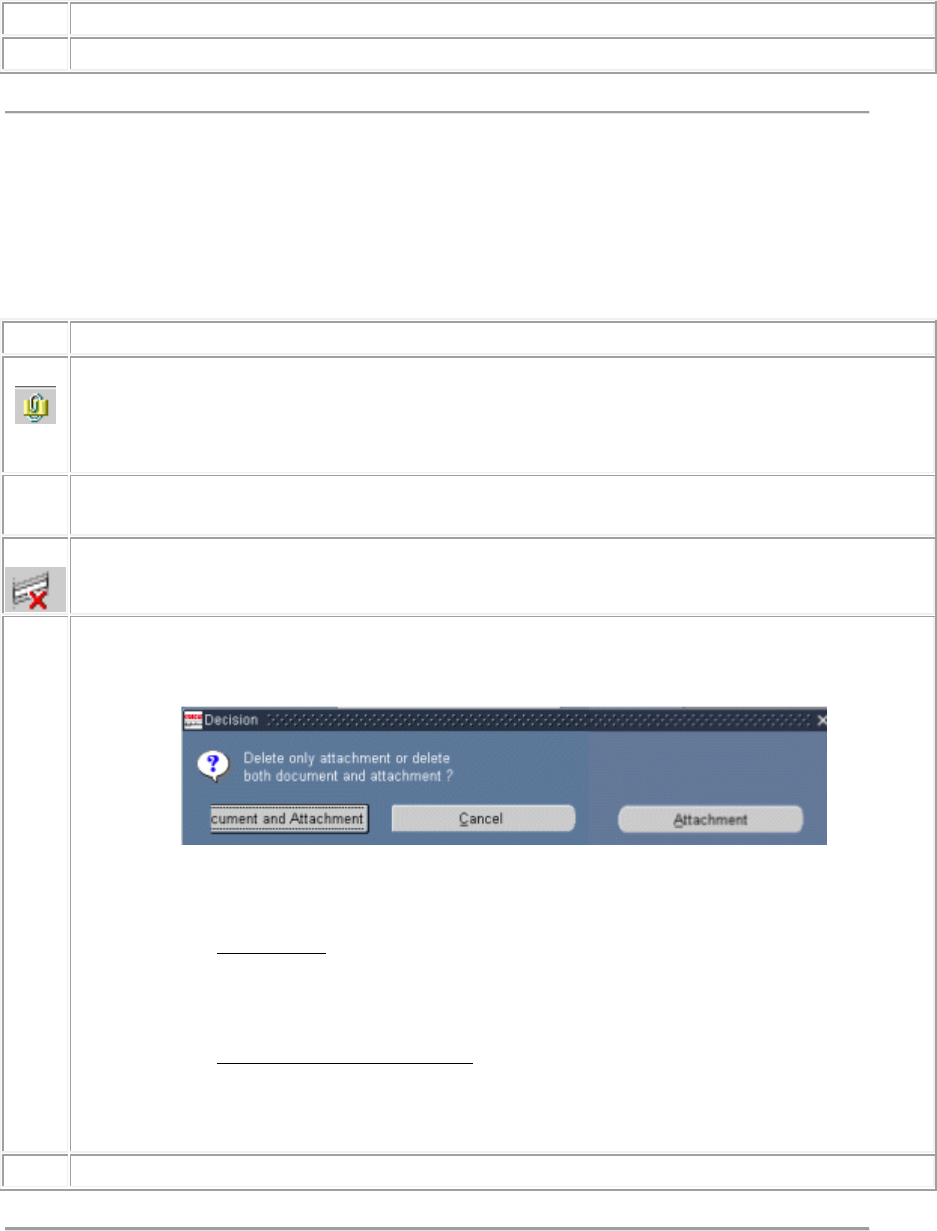
Click the Delete Record button on the toolbar.
4
The following message is displayed. Click the appropriate button.
o Attachment means that you are "un-attaching" the document from the
RPA, but the document itself will still exist. Note: documents attached to RPAs
in DCPDS are saved (stored) on the DCPDS server. When you use the delete
"Attachment" option, the document will still be using space on the server.
o Document and Attachment means that you are both un-attaching the
document and deleting it. This option will remove the document from the
DCPDS server and should normally be used.
5
Click the <Save> icon on the toolbar to save your changes to the Attachment Window.
