Tips for Creating and Uploading a Poster to
VirtualPosterSession.org
Last Updated 19 October, 2020
Even if you’ve done plenty of research/academic poster sessions before, some components will
be quite different in the new online format. Here are a few tips for creating your poster in a way
that’s best suited for online presentation using the platform at VirtualPosterSession.org
Recommended Software
Most people will be most comfortable with Microsoft PowerPoint or Google Slides for creating
posters. More advanced tools like Adobe Illustrator or InDesign, Microsoft Publisher, or the
Open Source package Inkscape can also make posters. We do not recommend using Adobe
Photoshop or the GIMP open source image software as these tools can produce very large and
difficult to handle files.
Links to Free options:
- Google Slides: https://slides.google.com/
- Inkscape: https://inkscape.org/
- LibreOffice Impress: https://www.libreoffice.org/discover/impress/
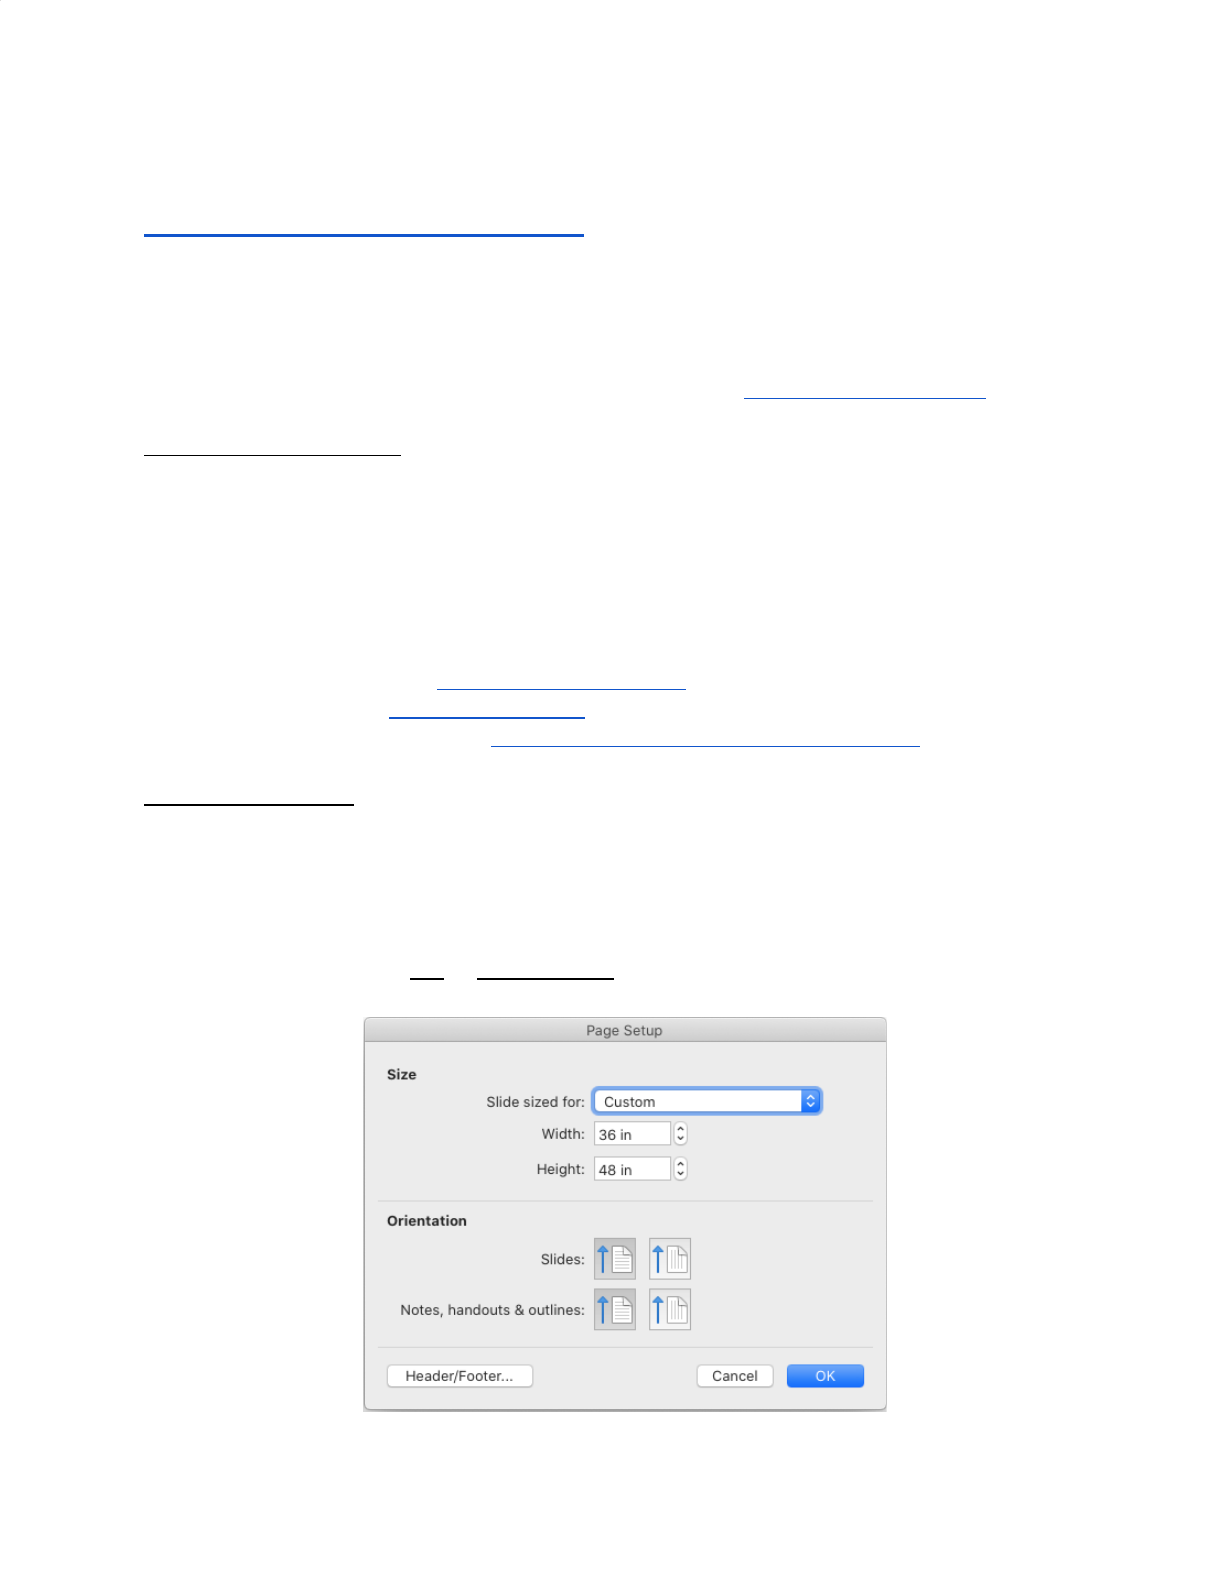
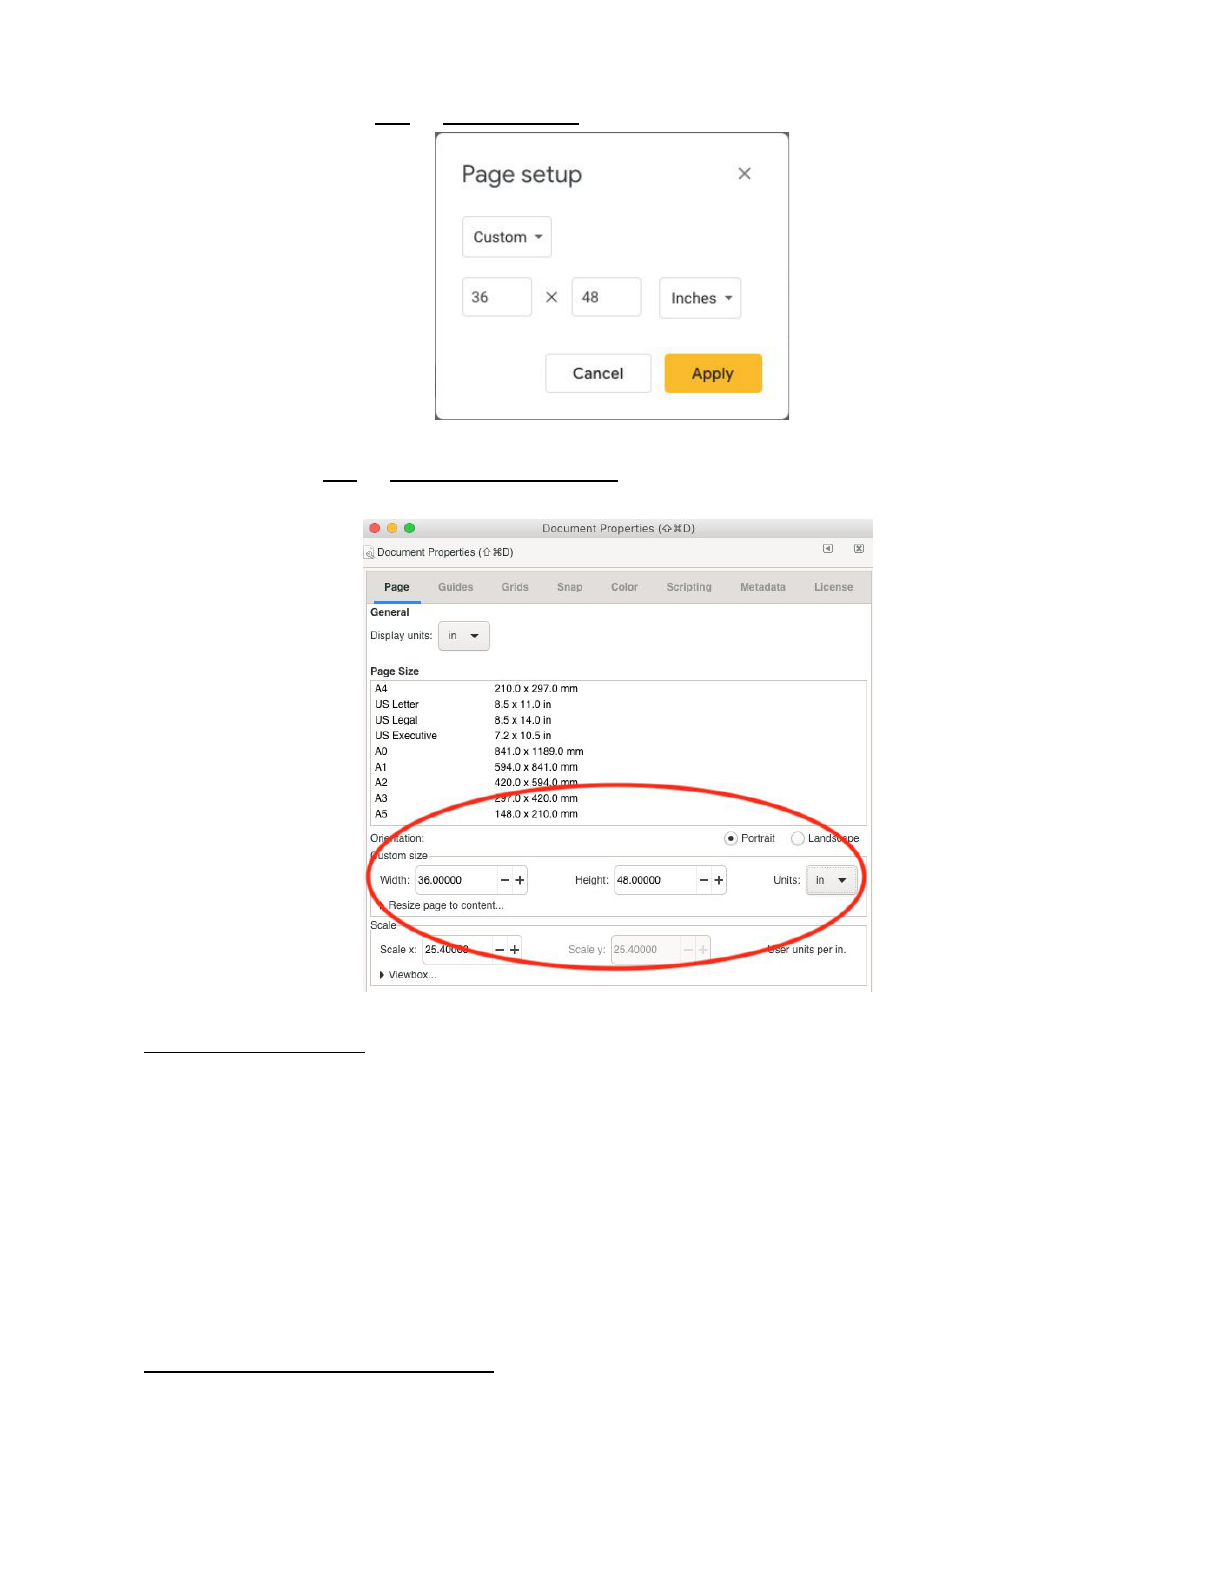
Basic Page Settings
VirtualPosterSession has no page size requirement, but we do have some suggested values.
Whatever software you use, you should set the page size to a portrait orientation, with a size of
approximately 36 inches wide x 48 inches tall, or 1 meter wide x 1.3 meters tall. If your
academic domain has a typical size format you could defer to that as well.
- PowerPoint: Go to File -> Page Setup… -> Then create a “Custom” size with the
dimensions above.
1
- Google Slides: File -> Page Setup… -> Create “Custom” size of 36x48 inches.
- Inkscape: File -> Document Properties… -> Change Width, Height, and Units in the
“Custom Size” box.
Legibility and Layout
To keep your text easy to read, try to maintain approximately 11 words per line on average. To
control this, make columns narrower and use a larger text size. Make sure there is sufficient
contrast between the text and background colors, and avoid the use of low-resolution
screenshots and photos when higher-quality images or PDFs are available.
Some general guidelines based on the poster sizes we suggest above:
- The poster title should be readable “from 10ft away” or in this case in the thumbnail.
- Use 32 pt font for all body text, and 48 pt for the section titles. These sizes should give
you two columns on the suggested 36” wide poster.
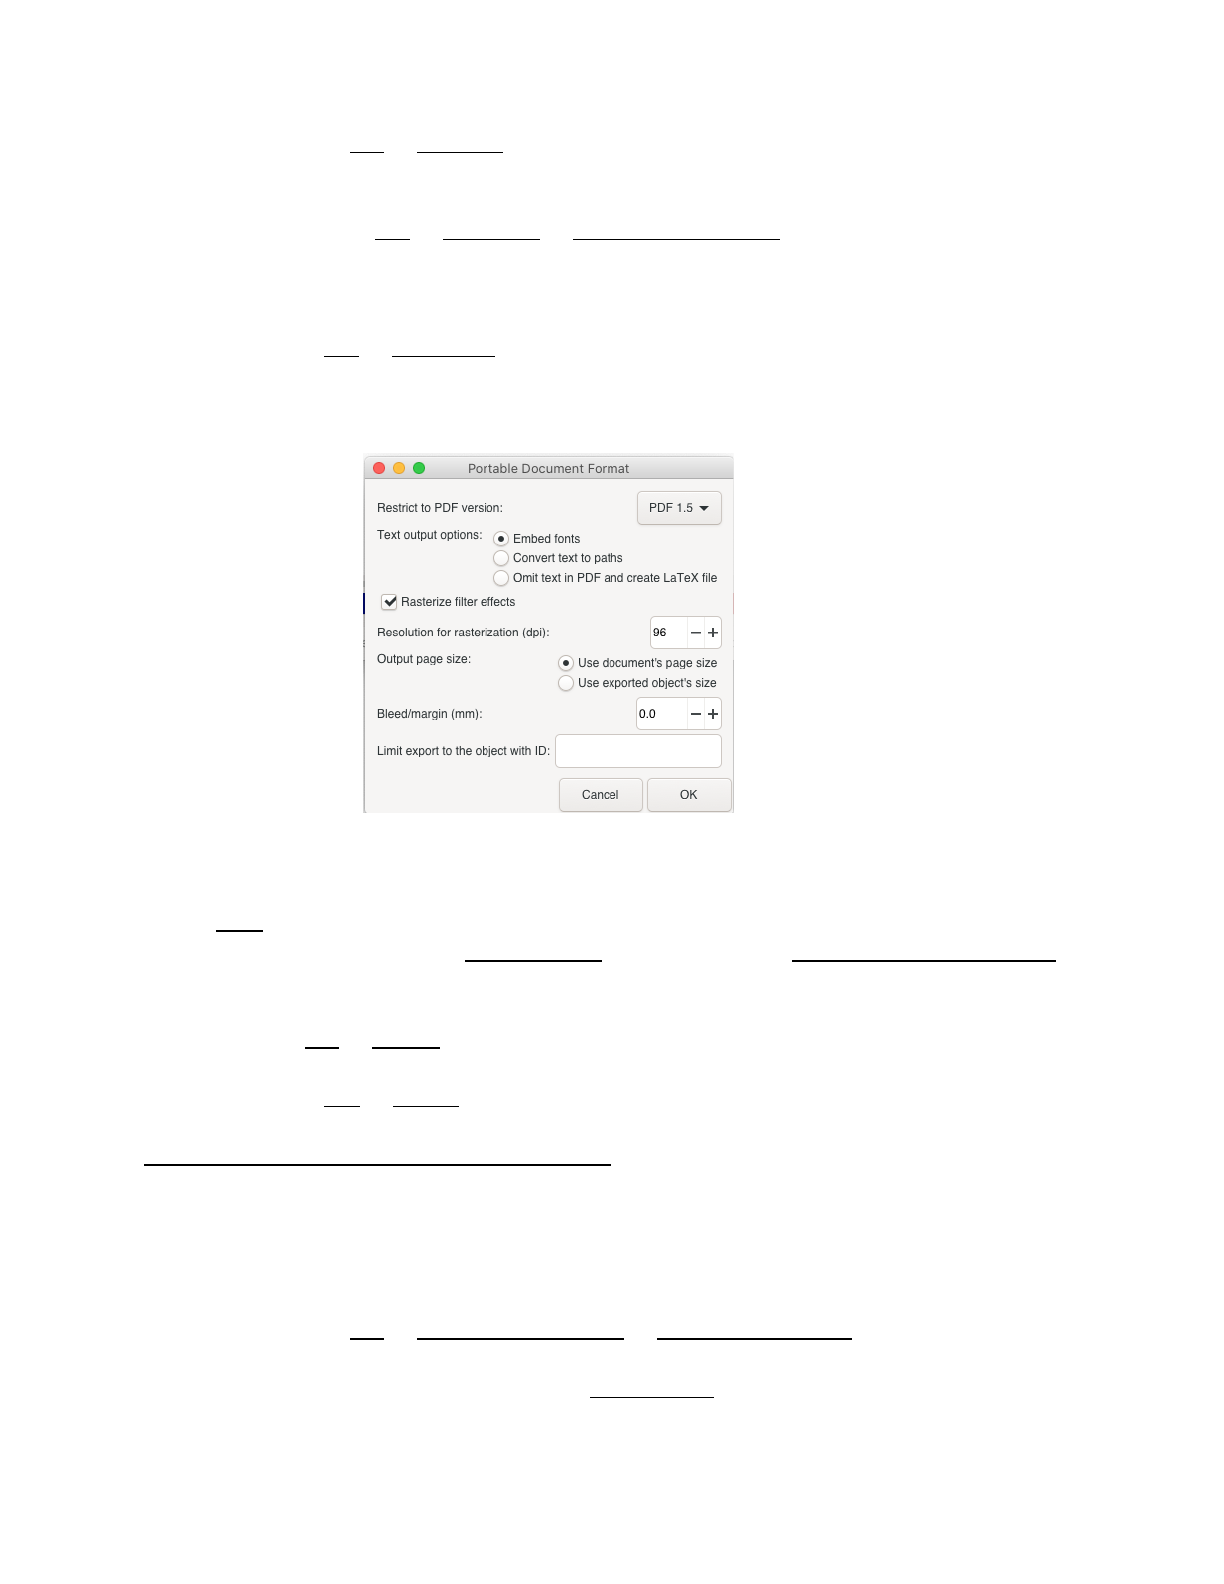
PDF Export to prepare for Upload
When you are done creating your poster, export it to PDF to ensure that all your content will be
accessible to visitors even if they don’t have the same software you used.
2
- PowerPoint: File -> Export… -> Make sure that “PDF” is selected as the File Format,
then give it a good name and click Export.
- Google Slides: File -> Download -> PDF Document (.pdf)
- Note: Often you can get better quality using your operating system’s “Print to
PDF” (below) instead of Google Slides export to PDF.
- Inkscape: File -> Save As… -> Make sure that “Portable Document Format (*.pdf) is
selected as the file format. If you are using the recommended 36”x48” size above, the
default options are acceptable, although you can increase the dpi from 96 if your images
become too blurry.
Print to PDF: Alternatively, you can use your Operating System’s “Print to PDF” or equivalent
feature for any software you choose:
- Note if you are using Chrome or a similar browser and do not see the below options in
the Print Dialog, click on “More Settings” and then click on “Print using system dialog...”
at the bottom of the list.
- macOS: File -> Print… -> Then in the print dialog box that comes up use the “PDF”
drop-box in the bottom left hand corner to select “Save as PDF”
Windows: File -> Print… -> Select “Microsoft Print to PDF” as the destination printer.
What to do if your Poster PDF file is too big?
VirtualPosterSession has a ~25Mb limit on uploaded posters. If your PDF is larger than that, it
will not be accepted. The most common culprit of oversize files is the inclusion of full-resolution
photos or other high-resolution images in your poster. Because the full image is embedded in
the PDF despite your cropping and shrinking, many images can add up fast, Often a
compressed image will do just fine, and some tools have to ability to do this for you:
- PowerPoint: File -> Compress Pictures… -> On-screen (150 ppi) should work great if
you have used the page settings above. If you are using a smaller page size (e.g. US
Letter or A4) then you may want to try HD (330 ppi) to capture more detail.
3

Updating your Poster entry on VirtualPosterSession.org
You will receive an invitation to upload your poster before the event. The link in this email does
not require any login, so if you are collaborating with others who need access you can share the
email. Click on the big purple invitation link you received, You will have the chance to enter the
details for your poster (if they have not been added for you).
1. By default, your email address is not shared with visitors, but if you would like them to be
able to contact you, make sure to check the box to the right of your email address.
2. Use your video chat platform to generate an invitation link for visitors to connect with you
about your poster. If no chat link is provided, then the link will not be shown to visitors.
a. Zoom: Click on Meetings at the top, then the “plus” sign to create a meeting time.
Once the meeting has been scheduled, you can copy the URL only
from the
invitation into the box provided by your session.
b. Microsoft Teams: Create a new meeting using “+ New Meeting” and add
yourself or a colleague to the “required attendees” box (your meeting will not be
sharable without another person). Click on “Send Update” to save the meeting,
then click on the meeting in your calendar again and go to the Description. Right
click on the “Join Microsoft Teams Meeting” link and select “Copy Link” to add to
your clipboard, then paste it into the chat URL box on VirtualPosterSession.
c. Cisco WebEx: After creating the scheduled meeting, Copy the “Meeting link”
found under “Meeting Information” into the box.
d. Google Meet: Click on New Meeting in GMail, or use Calendar to schedule the
meeting first, and copy the link provided into your chat URL box.
3. If your session allows it, you can provide a Pre-recorded Video URL of yourself
discussing your poster. You may use youtube.com, vimeo.com, or another platform to
upload the video. If no video URL is provided, then no link will be shown to visitors.
4. Upload your PDF file by clicking on the button under “Upload a PDF now” and wait until
the message says “done” before clicking on the big blue button to save all of your
changes.
5. After saving all of your changes, use the “Preview your poster” link at the top to see what
your poster will look like on the final listing.
Tips for presenting your poster (Live or Recorded)
When the time comes to discuss your poster, the best thing you can do is to be prepared! You
can either create a set of slides for each section of your poster, or open the PDF and be
prepared to zoom in and out while discussing your work. Be ready to screenshare using your
video chat to show visitors what you’re discussing.
We also recommend using a webcam to share your face - this provides more “presence” during
your poster session, because as with live presentations, facial expressions can go a long way!
When using a webcam, make sure to lift up your camera so that it is at eye level, and move 1-2
light sources close to the camera to keep dark shadows out of your eyes. Try to work from a
room without hard floors or other echo-prone surfaces in order to ensure your audio is clear and
easy to understand.
4
Troubleshooting VirtualPosterSession.org errors
Q: I can’t find my invitation email, or the link is expired / doesn’t work!
A: You can always access the presenter pages though a login using your own email address at
https://app.virtualpostersession.org/login or by clicking the “Login” button on the top-right corner
on the main page.
Q: When uploading my poster, all I see is “Failed” after uploading
A: This typically means that the PDF you tried to upload was too large. Try to trim it using the
suggestions above. If you continue to have problems uploading your poster please contact
Q: Why are my Greek/Latin/Mathematical symbols not appearing correctly?
A: Sometimes an issue occurs while copying data from certain operating systems (such as
Windows), in which different character encodings are used. To protect against this, always use
“Unicode” or “UTF-8” encodings, and select characters from an appropriate character map.
Q: Why can I no longer edit my poster when using my link?
A: Once the session has been published, only the organizer will be able to make changes. Make
sure that your materials are ready before the deadline!
5
